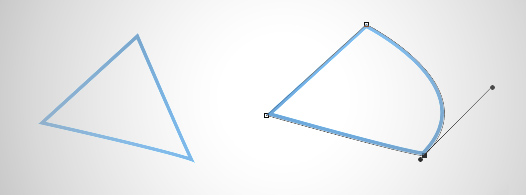
Bezier curves, created by Photoshop's "Pen tool", are commonly dismissed by beginners. Over the years, I've relied more and more heavily on these curves (also known as paths). In this post we'll explore their usefulness for digital painting.
Paths require patience
I was reluctant to incorporate paths into my workflow for years because they're so... boring. They just didn't feel "artistic" to me, since they're so unlike pencils and paint. Often they're best used as a preparatory step before adding color or tone to a line drawing. Tracing all of the major shapes in your image before adding the first brush stroke.. it's a tedious process. In a sense, you're creating a coloring book page for yourself - making staying inside the lines much easier. Over the years I've come to realize that these paths are very worth it, and tend to save time in the long run. Exercising the disipline to spend 30 minutes creating paths at the beginning of your rendering might translate into hours of saved fuss later.
Masking with paths
Though not terribly fun to create, paths are extremely easy to tweak.
For most cases, paths are the cleanest way to save an important mask in your image. You may remember one of my first Ctrl+Paint videos, found here, where I talk about creating "selection layers". The hidden layers shown in this video allowed me to save complicated shapes like a character silhouettes. What I didn' t mention in that video was "paths". Paths achieve the same end, though do it with a vector shape instead of a pixel one. The primary advantage here is the ability to modify the shape as your painting progresses. Paths don't degrade as you stretch and tweak them- allowing for much more versatility and control.
The paths palette
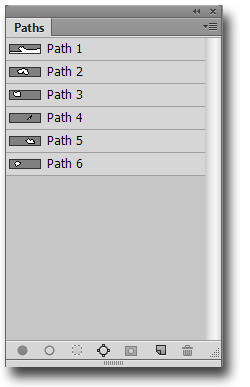
Since you'll want more than a single path in your image, it's important to understand the paths palette. Like a simplified version of the layers palette, you'll find familiar looking buttons at the bottom. These buttons allow you to make new paths, duplicate, and even fill paths with solid colors. Importantly, you can also generate a selection (marching ants) from the active path - just look for the button with dotted lines around a circle. Since the path thumbnails can be challenging to read, it's worth naming your path layers. Need to move a path from one layer to another? No problem - just cut and paste, using the paths palette instead of the layers palette.
One step at a time
If this is a bit overwhelming to you, my best advice is to start with the pen tool. It takes some getting used to, so experiment by tracing simple shapes. Once you get the hang of it, move onto forms that include a combination of curved and straight edges. Adding paths into your digital painting workflow won't happen overnight - but mastering the pen tool is a crucial skill for digital art and is well worth your effort.


